Understanding the Basics of Tile Installation
Tile installation is a skill that encompasses a variety of methods and materials, essential for creating durable and aesthetically pleasing surfaces in both residential and commercial settings. Various types of tiles are available, with ceramic and porcelain being among the most popular. Ceramic tiling is known for its versatility and affordability, making it an ideal choice for wall tiling and low-traffic areas. On the other hand, porcelain tiles, being denser and less porous, are often favored for floor tiling due to their durability and resistance to moisture, making them suitable for high-traffic areas.
In addition to ceramic and porcelain, natural stone tiles like granite, marble, and slate offer unique textures and colors, enhancing the overall design of a space. However, it is important to consider the specific properties of each tile type. For instance, natural stone requires additional sealing to prevent staining, while porcelain can often be installed in outdoor settings due to its strength and resilience.
To achieve a successful tile installation, several essential tools and materials must be gathered beforehand. Key items include trowels for applying adhesive, spacers to ensure uniform gaps between tiles, and grout to fill in those spaces after the tiles are set. Moreover, surface preparation is crucial; this involves cleaning the floor or wall surfaces thoroughly, ensuring they are level and free of debris. Proper planning aids in determining the layout and design before the installation process begins, reducing errors and waste.
Ultimately, understanding these fundamentals of tile installation lays the groundwork for a successful project, whether one is opting for wall tiling or floor tiling. With the right tools, materials, and preparation, anyone can master the art of tile installation, resulting in beautiful and lasting results.
Preparing the Space for Tile Flooring
Before embarking on any tile installation project, careful preparation of the space is crucial to achieve a durable and aesthetically pleasing finish. The initial step involves assessing the subfloor that will support the tile. It is vital to ensure that the subfloor is both level and free from any imperfections. Any unevenness can lead to cracking or shifting of the tiles after installation. For areas with wooden subfloors, it may be advisable to apply a cement backer board, which provides a stable and moisture-resistant base, especially beneficial for ceramic tiling.
Cleaning the subfloor is another indispensable step in the preparation process. This includes removing all debris, dust, and any existing flooring materials, which can interfere with the adhesive used in tile installation. Additionally, addressing potential moisture issues is paramount. It is essential to check for leaks and, if necessary, apply a moisture barrier to protect the tiles and grout from water infiltration, which could compromise the integrity of the entire installation.
Once the subfloor is prepared, it is important to create a layout plan for the tiles. This planning stage not only aids in achieving a visually appealing design but also helps in minimizing waste. Measure the area accurately to determine how many tiles will be needed and where cuts may be required. Marking the center of the room and laying out a few tiles without adhesive can provide a clearer vision of the finish and allow for adjustments if necessary. Utilizing spacers will ensure consistent gaps between the tiles. By following these steps meticulously, the foundation for a successful tile installation will be firmly established, setting the stage for a beautiful and enduring flooring solution.
Step-by-Step Guide to Installing Tiles
Installing tiles is an intricate process that requires precision, patience, and proper technique to ensure a successful outcome. The first step in tile installation is preparing the substrate, which must be clean, dry, and free of any debris. For floor tiling, it is advisable to use a cement backer board or an underlayment to provide a solid foundation for the tiles. Once the substrate is prepared, the next step is to mix thin-set mortar according to the manufacturer’s instructions, ensuring a consistent and workable mixture.
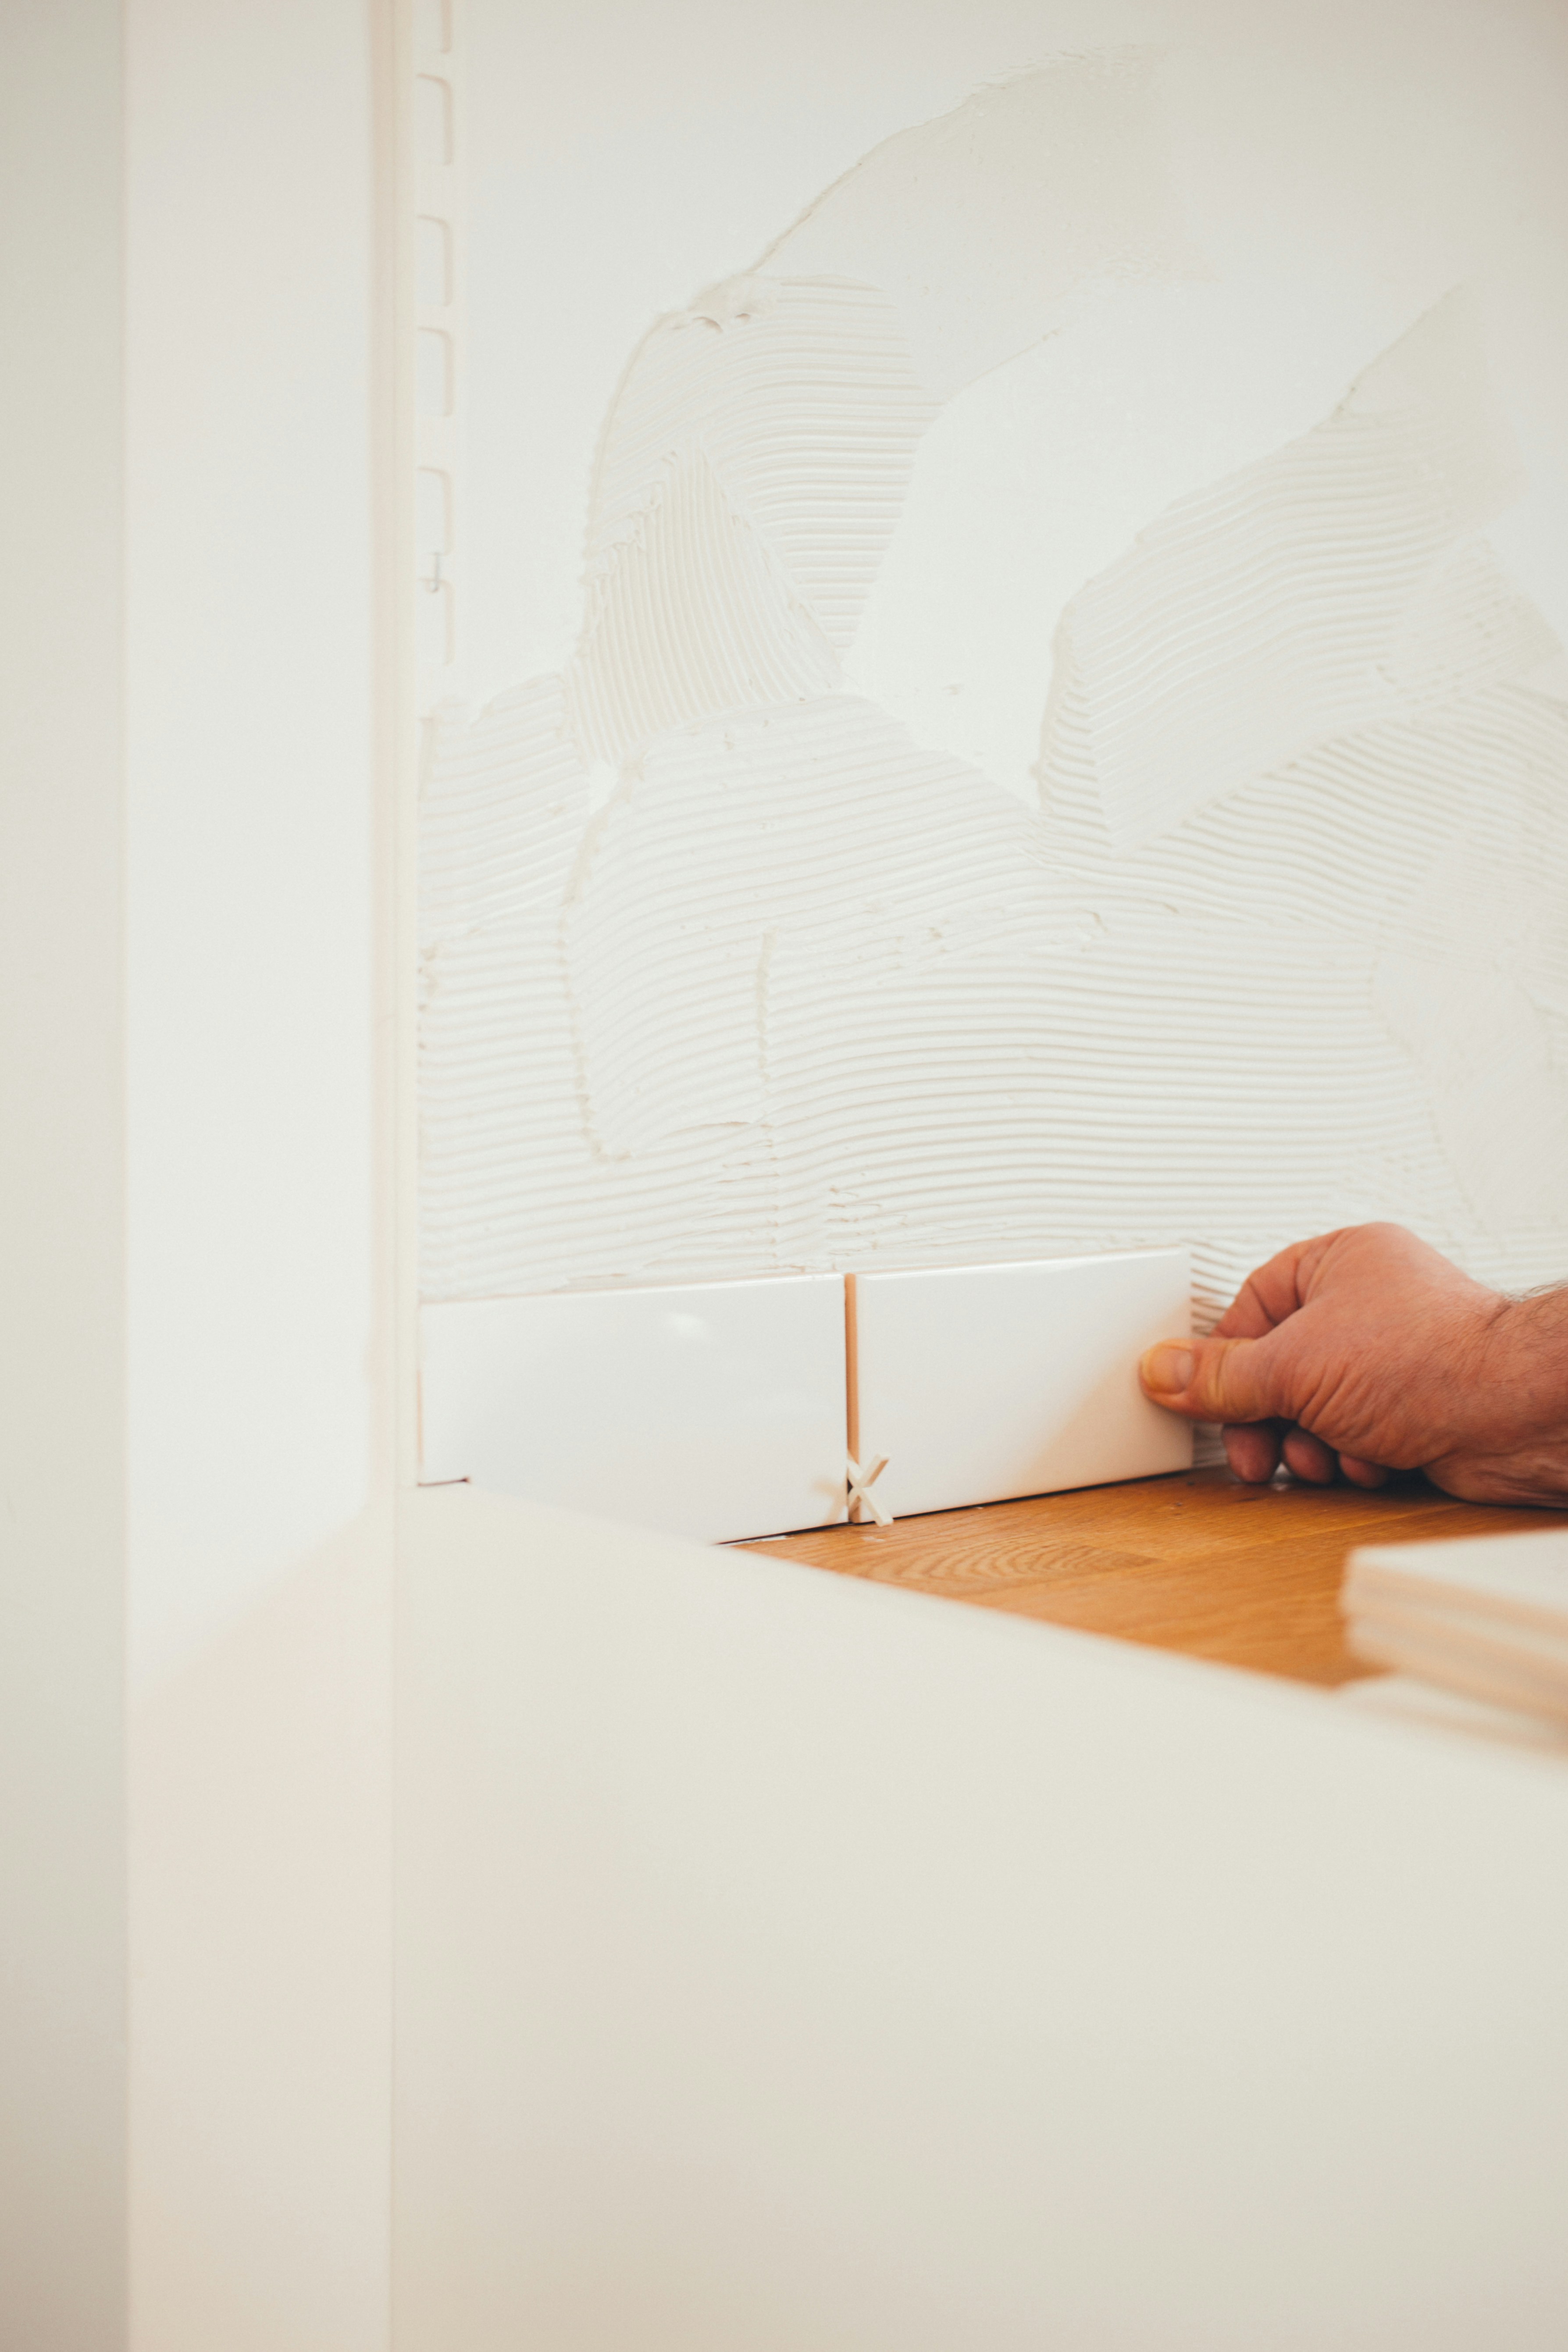
After the mortar is prepared, use a notched trowel to apply it evenly onto the substrate. It is important to hold the trowel at a consistent angle to create an even layer. Once the mortar is spread, begin laying the tiles by positioning the first tile at a corner, ensuring it is aligned with your layout lines. Firmly press down on the tile and give it a slight twist to set it into the mortar. It is vital to maintain consistent spacing between the tiles, which can be achieved using tile spacers. These spacers will help ensure even grout lines, contributing to a professional finish.
As you continue placing tiles, it may be necessary to cut tiles to fit around the edges or obstacles. For this, a tile cutter or wet saw is recommended to achieve clean and precise cuts. If, during installation, you encounter any common issues such as uneven tiles or misalignment, do not hesitate to pull up the affected tiles and reapply the thin-set mortar as needed. Furthermore, allowing the mortar to cure properly is crucial; this typically takes 24 to 48 hours before grouting. This curing time will ensure that the tiles adhere securely and reduce the risk of shifting or cracking over time. Following these steps will lead to a successful tile installation, whether it involves ceramic tiling or porcelain tile.
Finishing Touches and Maintenance Tips
Once the tile installation process is complete, the finishing touches play a crucial role in ensuring both the aesthetic appeal and longevity of the tiled surface. One of the key stages in this process is grouting the tiles. Grout serves not only as a visual enhancer, but also as a protector against moisture that can compromise the integrity of the flooring. It is essential to choose the appropriate type of grout; while sanded grout is often used for floor tiling due to its durability, unsanded grout is typically recommended for wall tiling, especially in areas prone to movement or cracking.
After carefully applying the grout between the tiles, any excess should be removed promptly. This step requires a damp sponge to wipe away residue without disturbing the grout lines. Once the grout has cured—generally for approximately 24 to 48 hours—it is advisable to seal the grout to provide added protection against stains and moisture intrusion. When selecting a grout sealer, consider the specific characteristics of the tile, whether it be ceramic tiling or porcelain tile, to ensure compatibility.
Maintaining tile flooring involves regular cleaning and care. It is recommended to utilize a pH-neutral cleaner specifically designed for tiles. Harsh chemicals can damage the finish of the tiles and degrade the grout over time. For routine maintenance, sweeping or vacuuming the area to remove dirt and debris before mopping will prolong the life and appearance of the flooring. Periodically inspecting the grout lines for cracks or discoloration is also beneficial; addressing any issues promptly through re-grouting or resealing helps maintain the overall integrity of the tile installation.
In conclusion, the expert tile installation process is indeed just the beginning. By incorporating proper finishing techniques and ongoing maintenance, homeowners can enjoy beautiful and enduring ceramic and porcelain tile floors for years to come.